Well, that's all going to change from now on. Now that I have plenty of time to spend on making more complex projects with nice yarn, I'm willing to take a little more time on them. I've always said that when I knit, I'm more about the journey than the destination. Being on Ravelry, and featuring some of my projects on my blog for friends and family to see, however, has made me a little more conscious of how my projects end up. I'm still mostly about the journey, but I want the destination to be a nice place, you know?
So, on to my adventure with blocking. First, I read up on the process at a few different places. I got the best advice from Eunny Jang's blog (while you're there, check out her Print O' the Wave stole, which is currently on my needles). Then I read a couple of threads on Ravelry to figure out the best way to pin my project. A lot of people block on a guest bed or a carpeted floor. With the kids running about, I didn't think either of those options would work, so I ended up buy a cardboard presentation board from Joann Fabrics. It's the kind of thing a kid would use to show their project at a science fair, if you know what I mean. It was very inexpensive, it folds up, and it will be easy to stick pins into. Also, I can move it to a safe place when the kids are around.
I used a few binder clips to hold two plastic bags over the cardboard. For my current project, the Stag Bag, I didn't need a lot of surface area, so I used the cardboard folded up. The binder clips not only help the plastic stay in place, but they keep the board folded!
I used the enamel soaking/rinsing basin for my wool dyeing to soak the bag. Because I'm a dweeb, I documented it here:

Here are some shots of the bag pinned on the blocking board:
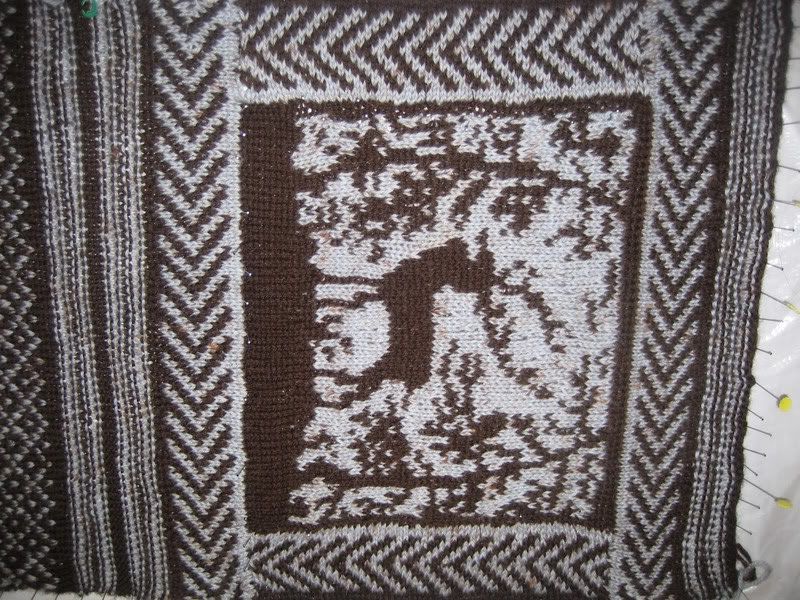
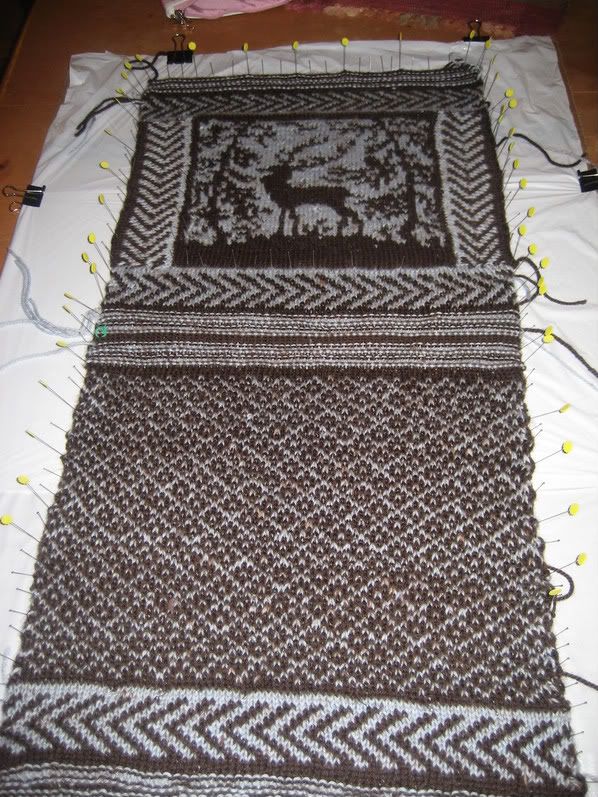
Isn't it pretty? My stranded color work looks so much better after blocking. There are still a few loose stitches in the graphic that make the stag picture look uneven, but I'm hoping to tighten them up a bit after the piece dries. I'm inordinately proud of this project, to the point that I made Jim come over and love on the bag for a bit. Yes, I actually forced him to compliment me on it for several minutes.


No comments:
Post a Comment